This guide covers connecting and configuring Fortnox inside the Junipeer app. It assumes you have already completed all preparation steps in Fortnox itself — if not, start with Prepare Fortnox for integration first.
Step 1 — Activate flows
The first objective for integrating systems is to turn on the desired flows of operations. Please proceed through Dashboard -> Integrations -> (selected integration) -> Get Started -> Select flows to reach the similar view:
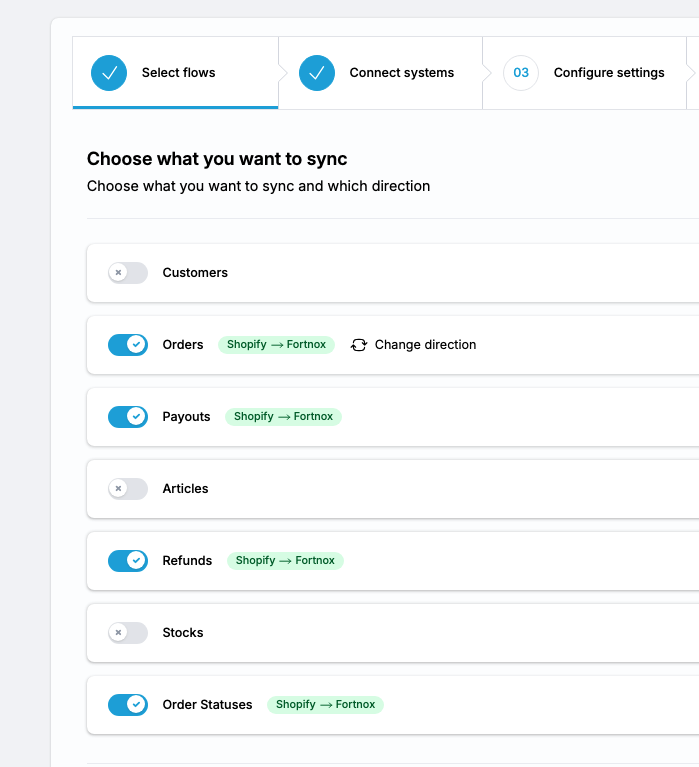
This step is highly dependant on the business requirements around the integration and constitutes a foundation of the next steps.
Step 2 — Connect Fortnox via OAuth
Junipeer connects to Fortnox using OAuth. You will be redirected to Fortnox to authorize the connection.
In the Junipeer app, open your integration (from Dashboard -> Integrations) and navigate to Get Started → Connect Systems
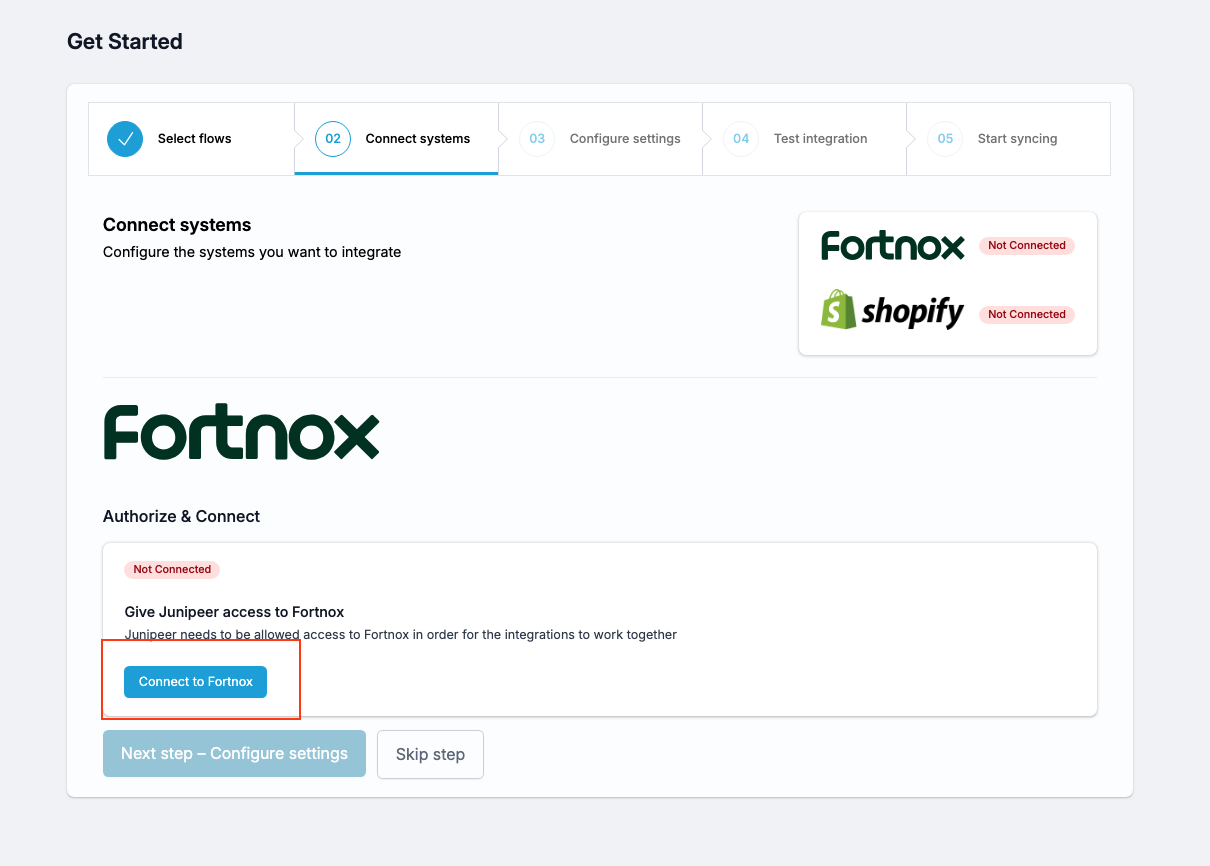
Click the Connect to Fortnox button
You will be redirected to Fortnox — log in with the dedicated integration user you created during preparation (not your personal admin account)
Approve the connection
You are redirected back to Junipeer with a green Connected status
If you manage multiple Fortnox companies, make sure you are logged into the correct one before approving the OAuth connection.
Step 3 — Configure settings
Navigate to Configure → Settings in the Junipeer app. Work through each section.
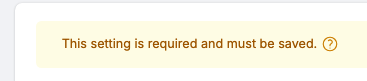
The rule of a thumb is to go through the settings that are labeled as required:
Other settings can be considered miscellaneous, unless tests or specific business requirements will prove otherwise. There is plenty of possible settings between systems and it's not a good practice to consider each of them. The main objective of early configuration is to produce testing environment.
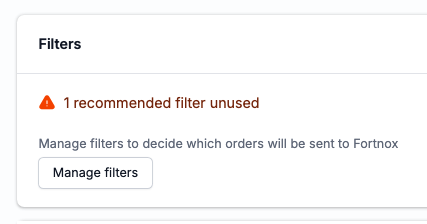
Recommended filters can be disregarded unless you want to filter out specific entities from the integration:
Apart from the settings labeled as required, here are some relevant sections to consider:
Add order number to Fortnox
Under General settings you find:
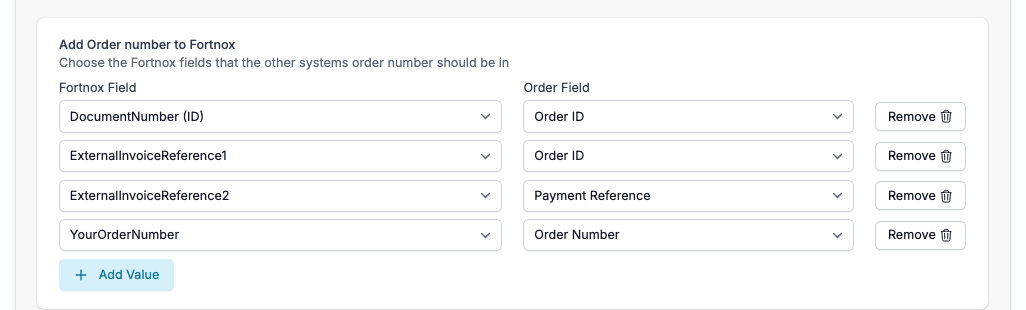
This is a recommended schema for Shopify -> Fortnox configuration.
Invoice settings
Set the process of automating the invoice creation:
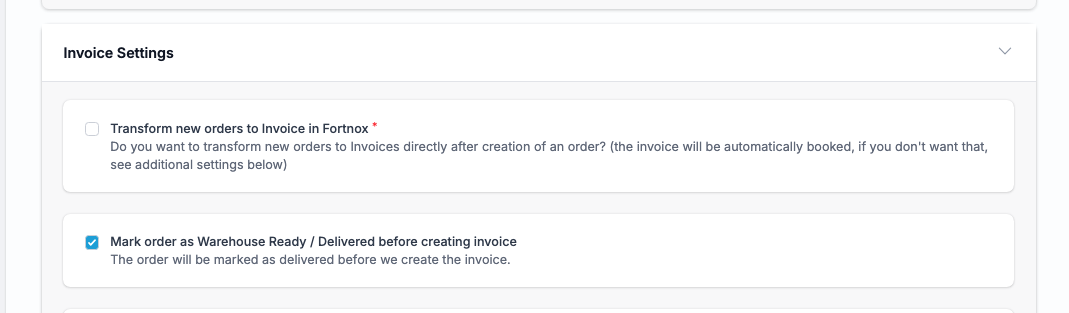
Transform new orders to Invoice in Fortnox is one of the most important settings in this section. When enabled, Junipeer creates a Fortnox invoice immediately when an order arrives — regardless of the order's status in Shopify. This means an invoice is created even if the order has not been fulfilled, paid, or shipped yet.
This may not be the right approach for your workflow. If you want invoices to reflect actual fulfillment — i.e. only create an invoice when an order is shipped — you should deselect this setting and use the Transform Invoices flow instead. This flow triggers invoice creation based on the fulfillment event in Shopify, using the fulfillment date rather than the order creation date.
In short:
Transform new orders to Invoice checked → invoice created immediately on order arrival, regardless of fulfillment status
Transform new orders to Invoice unchecked + Transform Invoices flow → invoice created when the order is fulfilled in Shopify
Which approach is correct depends on your business model. B2C stores that capture payment at checkout typically use the immediate approach. Stores that invoice on delivery (common for B2B) should use the fulfillment-based approach.
Map the non-integrated methods (PayPal, Amazon) if needed:

OSS sales account mapping
If you sell to consumers in other EU countries under the OSS scheme, map each country/VAT rate combination to the correct Fortnox sales account here: Configure → Settings → Sales Account mapping & OSS VAT.

You prepared these accounts in Fortnox during preparation. If you made a spreadsheet of account numbers per country, this is where you enter them.
For stores selling across many EU markets, this can involve 20+ mappings. Take your time here — errors in OSS mapping lead to incorrect VAT bookkeeping.
Key principle:
Use 3000-series accounts (sales accounts), not 2000-series accounts (VAT accounts).
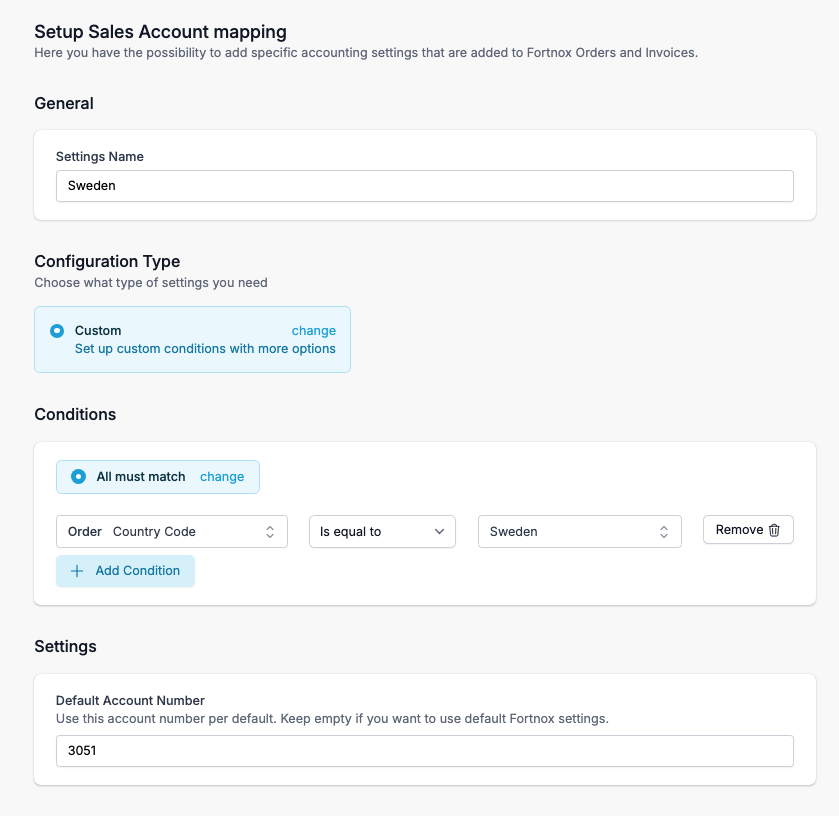
Setting up OSS Mapping
You create an entry per country in the Sales Account Mapping section and assign:
Country Code
Default Account Number (e.g., 3000, 3001, 3002…)
You can also set different sales accounts per VAT rate. Ex 25%, 12%, 6% etc.
Please mind that mapping your own VAT Numbers to specfic country is impossible, since there is no such field/function in Fortnox invoices. This is something that comes further down the accounting process (Fortnox settings, reporting process), not a direct setting in Junipeer.
Please refer to Fortnox Guide in case of need: LINK
Configuring Sales Account mapping
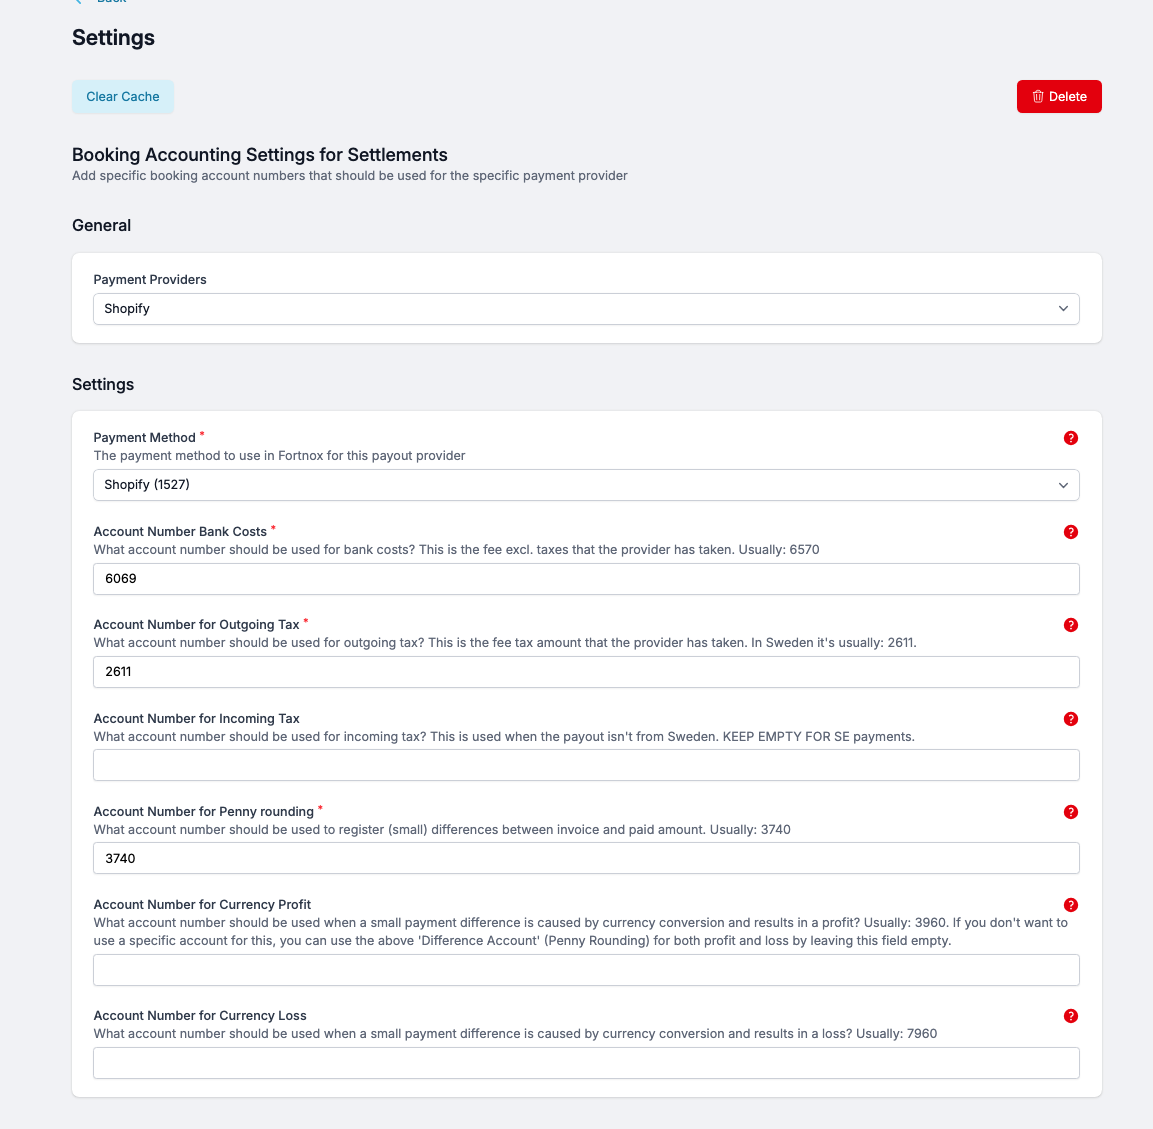
Booking Accounting Settings for Settlements
This section tells Junipeer which Fortnox accounts to book each part of a PSP settlement to. When a payout arrives from your payment provider, the total is rarely a single clean amount — it comes bundled with fees, taxes, rounding differences, and sometimes currency conversion effects. Each of these has to land in the right accounting bucket in Fortnox, or your books drift out of sync.
Order exclusion date
Under Configure → Settings → Order Settings, you can set a start date for order sync. Junipeer will only process orders placed on or after this date — preventing it from attempting to retroactively sync your entire order history on the first run.
This is particularly useful if you are going live mid-month or have a large backlog of historical orders you do not want to import.

B2B and B2C in the same integration
If you are using Shopify's native B2B functionality, Junipeer can use the Company External ID field in Shopify to map a B2B company directly to its counterpart in Fortnox. This gives you a stable, one-to-one company mapping. If Company External ID is not set, Junipeer falls back to VAT number, organisation number, or email — which is less reliable. We recommend using native Shopify B2B over third-party B2B apps (such as BSS), as third-party apps can cause incomplete order data to reach Junipeer.
Step 4 — Test the integration
Before going live, run at least one test sync:
Create a test order/customer in your e-commerce platform
Enter the order ID in the Junipeer test panel
Verify the result in Fortnox — check that the invoice is created correctly, VAT is applied as expected, and the payment method is booked to the right account
If a test fails, check Logs in Junipeer for the error. The most common causes are missing article numbers, an incorrect VAT account, or a currency that is not enabled in Fortnox.
Step 5 — Start syncing
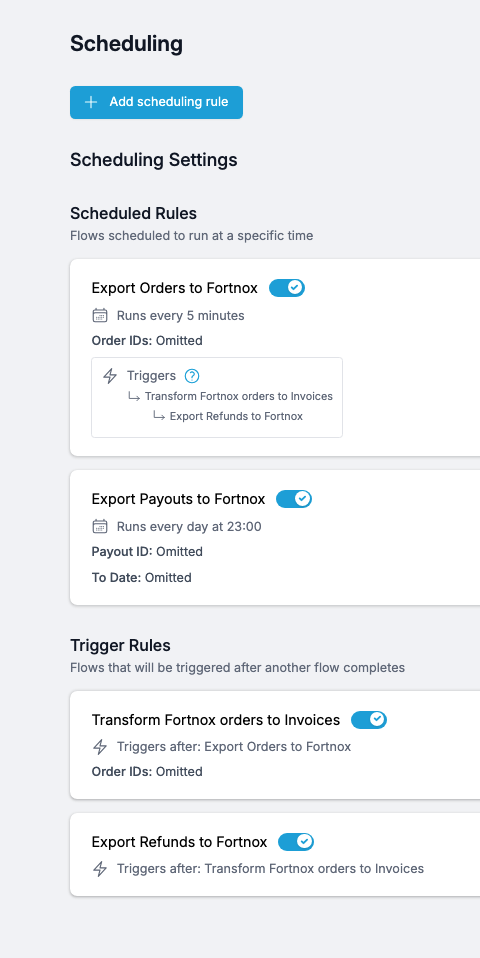
Once testing is complete, configure your sync schedule under Get Started → Start Syncing. This is your go-live step.
Run a test sync with a single order before enabling scheduling. It is much easier to catch mapping errors upfront than after bulk syncing has started.
Here is a model of standard sync setup:
Known limitations
Warehouse module — see the Warehouse module section above for the required configuration. Skipping the delivery timing setting is the most common cause of warehouse workflow issues.
Booked invoice immutability — once an invoice is booked in Fortnox, it cannot be edited or deleted. Corrections require a credit note. This is standard Fortnox behavior.
Order number format — the original e-commerce order number is stored in a reference field in Fortnox. You can look up the mapping on the References page in Junipeer.
For troubleshooting, see the Error Codes reference or contact support@junipeer.io.